You can Do it with the steps I have created below, and hopefully what I write useful to all. thank's.
Final First:
Step 1
Create a new document with these settings like 1a. The first layer, call it “background” and fill any color. Then Open the Blending Options and settings (1b)Step 2
Create a new folder, call it “ipod”. In this folder, create a new layer, call it “ipod” as well. Select the Rectangle Tool (U) to draw a rectangle shape like the one below (2a). Select the Pen Tool and click on the shape. After that, create four nodes of the shape as shown. At the top line, click to make a node between two top nodes. Then correct the top line of the curve by holding “Command” down, and clicking and dragging the node upward by a little (2b). Do the same with bottom line, but downward this time(2c). Then press Command + Enter to make the selection and fill that with color (2d)Step 3
Open the Blending Options menu for “ipod” and adjust the settings like in image 3a. Create a new layer on top, call it “light ipod”. Use the Rectangular Marquee Tool (M) to make a rectangle selection and fill it with white (3b). Then reduce the Opacity to 30% (3c)Step 4
Create a new layer on top, call it “screen bg”. Use Round Rectangle (set Radius: 5px) to draw a shape like one below and fill it black color (4a). Then open Blending Option and setting (4b)Step 5
Use the Rectangular Marquee Tool to make the selection (5a). Press Command + J to duplicate this selection, rename the new layer “screen bg light”. Reduce the Opacity to 30% (5b). Then open the Blending Options and use the following settings (5c)Step 6
Create a new layer on top, and call it “screen”. Use the same tool to make the rectangle selection right in the middle of the “screen bg” and fill it with black (6a). Then open Blending Options and use these settings (6b)Step 7
Use the Polygon Lasso Tool to make the selection like in 7a. Press Command + J to duplicate this selection, rename the new layer “light screen”. Open Blending Options and use the specified settings (7b). Then reduce the Opacity to 30%.Step 8
Create a new layer on top, call it “button bg”. Use Elliptical Marquee Tool to make the circle selection and fill it with white (8a). Then open Blending Options and use these settings (8b, 8c)Step 9
Create a new layer over “button bg”, and call it “circle”. Use the same tool to make the smaller circle selection and fill it with white (9a). Then open Blending Options and copy these settings (9b, 9c). Add a button icon on “button bg” (9d)Step 10
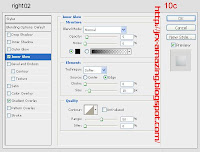
The right earphone is up next.Create a new folder (outside “ipod” folder), call it “right earpiece”. Use the Elliptical Marquee Tool and the Pen Tool (P) to draw like in the steps below (10a). In turn, open the Blending Options of each layer and use these settings (10b, 10c, 10d).
Step 11
Create a new document (20 x 20px) with a transparent background. Choose the Custom Shape Tool, select the diagonal shape (11a). Draw and fill with black (11b). Then go to Edit > Define, name it “diagonal” and close this document (no need to save).Step 12
Come back to the main document. Create a new layer under “right 03”, and call it “right 06”. While holding “Command” down click on the layer “right 03” to obtain its selection. Go to Select > Modify > Contract, put Contract by 2px. Go to Edit > Fill, at Contents select Pattern, at Custom select “diagonal”.Step 13
The left earpiece.Create a new folder (outside “right earpiece” folder) between “ipod” folder and “background”, call it “left earpiece”. Do the same steps of “right earpiece”.
Step 14
In the “left earpiece”, create a new layer on top, call it “shadow left” and according to the following images:Step 15
Create a new layer under “left earpiece” folder, call it “line”. Use Pen Tool to draw like 15a. First, set Brush tool is hard brush 4px, black color. Then press U, click right mouse on the image, select Stroke Path to draw black line (15b). Open Blending Options this layer and setting (15c).Step 16
Press Command + J to duplicate “line”, rename new layer “line shadow”. Move it under “line” and reduce Opacity to 40%. Then move this layer down a little.Step 17
Create a new folder under “left earpiece” folder, call it “shadow”. Use Brush Tool, Pen Tool, and Elliptical Marquee Tool to draw accordin to the following images below:Note: To enlarge the picture you can Right-clicking
Click To View :
Labels: Tips Photoshop


